HEATCUBE Behind the scenes
The time came in March 2025: We presented our HEATCUBE to the general public for the first time at the BePOSITIVE trade fair in Lyon. The feedback has been consistently positive. With HEATCUBE, we are not only expanding our portfolio but also tapping into a new, previously unknown market. The series was developed with a clear focus on the rapid renovation of existing heating systems – a goal that we have consistently pursued throughout the entire development process.
But theory is one thing – real-life experience is another. In a real installation situation, we wanted to know whether we had achieved our goals.
Step 1: Removal of the old system
The initial situation was a typical scenario: an originally open fireplace that was retrofitted with a fireplace cassette a few years ago. This cassette was removed first. The next step was to measure the appropriate HEATCUBE model – the HEATCUBE 57x68 was chosen.
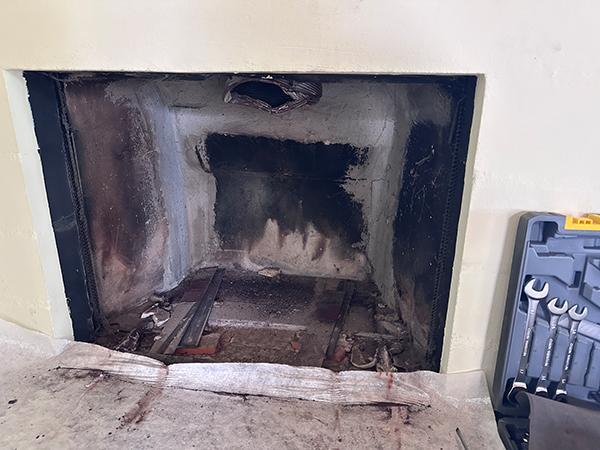
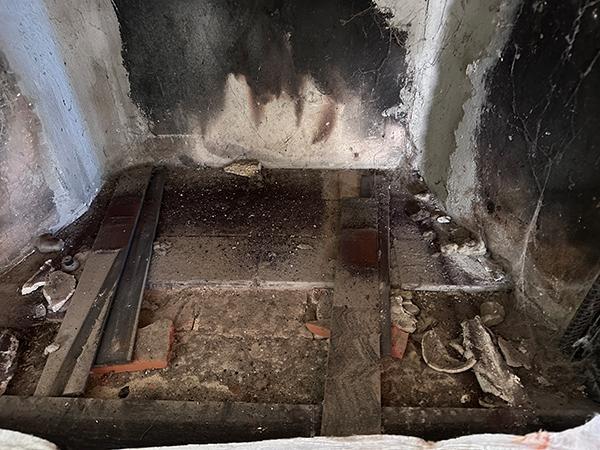
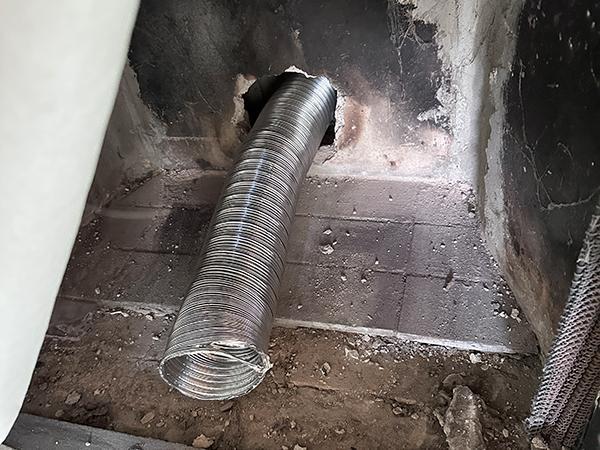
Since the installation space was a few centimeters too small, we had to rework it with a pointed chisel and also create an opening for the fresh air connection, which was not there before. As the system was located directly on an external wall, this could be done without any problems. The resulting hole was temporarily covered.
Step 2: Ordering and preparation
We ordered the HEATCUBE 57x68 model with a fresh air box at the rear and the corresponding customized plug-in panels, as we were unable to use our standard panels due to the large distance to the side. The required dimensions were 7 cm on the sides and 4 cm at the top..

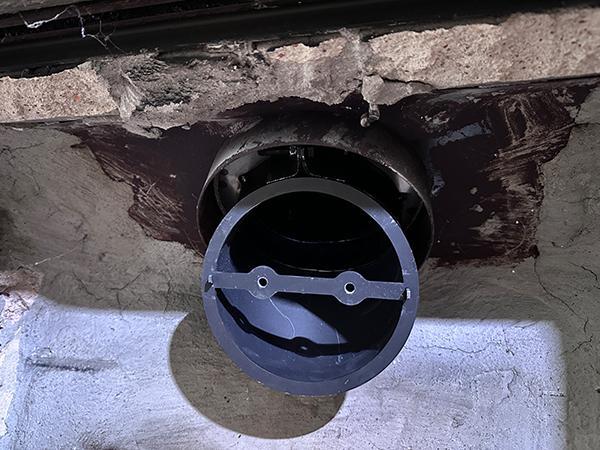
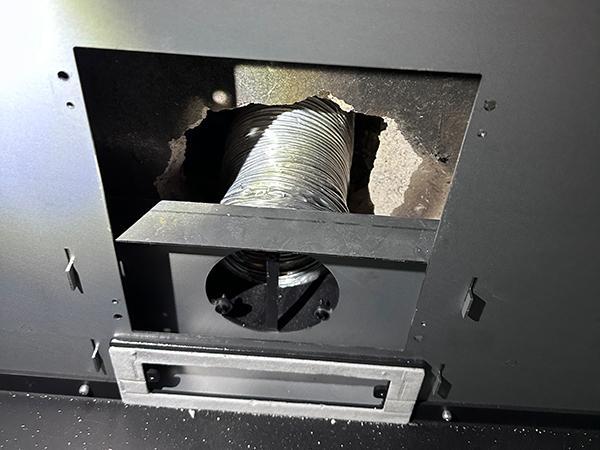
Another challenge was the flue gas connection: HEATCUBE has a 15 cm outlet, but the existing system had a 20 cm connection. Due to the very limited space, we had a suitable transition piece customized.
Step 3: HEATCUBE installation
The smoke extraction tube was prepared first. We then prepared the housing for the rear fresh air connection and inserted it. Thanks to the large rear panel opening, the connection was straightforward. We then organized the housing, and two points were decisive:
- The housing must stand upright on the floor.
- The distance between the side walls of the housing and the masonry must be 41 mm so that the push-in panel can later be flush with the wall.

To fix it in place, we filled the gap between the housing and the rear wall with insulation and secured it with mortar. After a short drying time of 15 minutes, we continued:
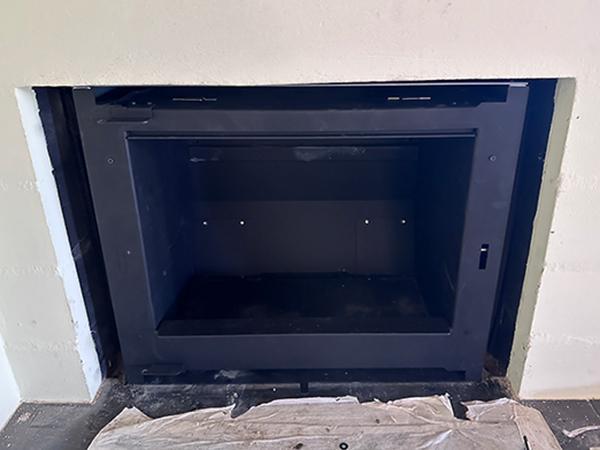
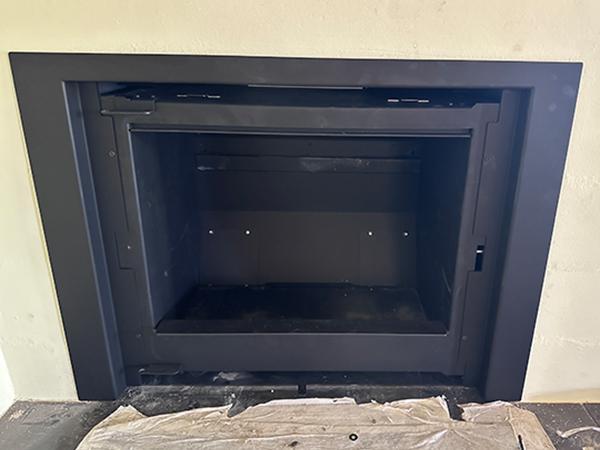
- Base body inserted
- Smoke outlet mounted
- Base body screwed to the housing
- Plug-in cover attached
- Firebox inserted
- Grille mounted
- Door mounted
Conclusion
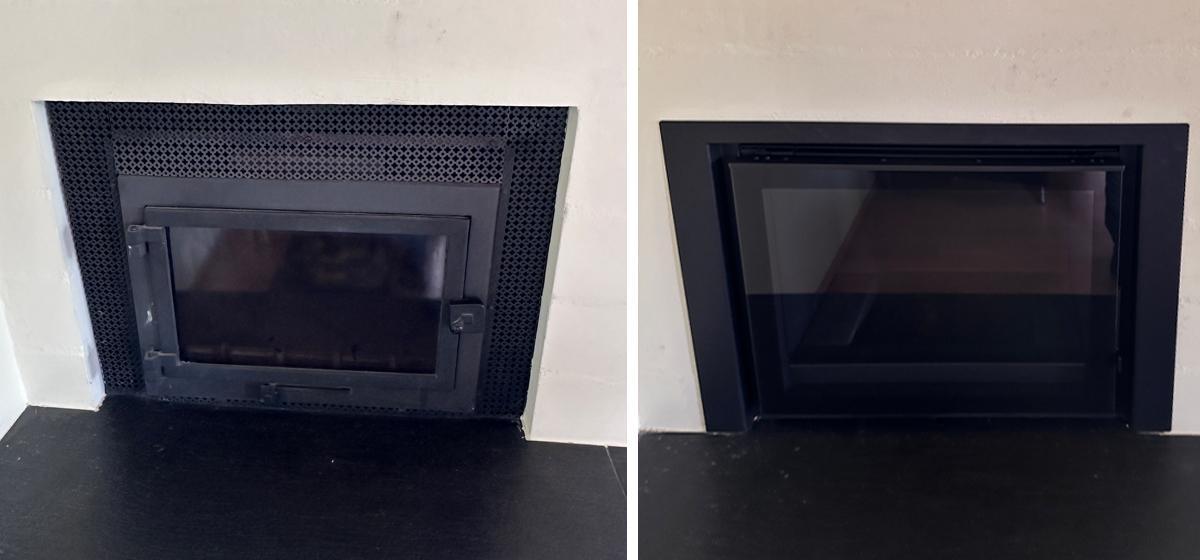
The entire conversion – from dismantling to final commissioning – took less than a day. The direct comparison before and after (see above) clearly shows how well HEATCUBE performs.
Even more important:
The practical implementation confirms our development concept. With HEATCUBE, we have created a series that makes modernization easy, fast, and of high quality – a real benefit for both specialist partners and end customers.